This DIY Face Mask Works Better Than Store-Bought Creams
DIY face masks often work better than store-bought creams because you can tailor them to your specific skin needs. By using natural ingredients, you avoid harmful chemicals and preservatives found in commercial products. Plus, you can achieve better hydration, exfoliation, and brightening effects based on what your skin craves. Making your own masks also turns skincare into a fun ritual. Want to learn how to create the perfect mask for your skin type?
Key Takeaways
- DIY face masks allow customization for specific skin needs, addressing issues like dryness or blemishes more effectively than generic store-bought creams.
- Natural ingredients in DIY masks avoid harmful chemicals and preservatives often found in commercial products, reducing the risk of skin irritation.
- Creating a face mask at home can be a fun, relaxing self-care ritual, enhancing overall skin health and well-being.
- Ingredients like honey and aloe vera provide deep hydration, while natural exfoliants improve skin texture better than many commercial alternatives.
- Regular use of homemade masks (2-3 times a week) ensures consistent nourishment and long-term skin health improvements.
Benefits of Using DIY Face Masks
When you choose to use DIY face masks, you’re not just pampering your skin; you’re also reaping various benefits that commercial products mightn’t offer.
Creating your own mask means you can tailor it specifically to your skin’s needs. Whether it’s soothing dry patches or fighting blemishes, the right ingredients can make all the difference.
You get to skip harmful chemicals and preservatives often found in store-bought creams, opting instead for nourishing ingredients from your kitchen.
Plus, using a DIY face mask can be a fun, relaxing ritual that allows you a moment of self-care. As you blend and apply, you’ll feel connected to your skin, nurturing it in a way that feels intimate and personal.
Incorporating natural exfoliants, like sugar or oats, in your mask can enhance glow on your skin and improve its overall texture.
You’ll love the results!
Key Ingredients for an Effective Face Mask
To create an effective face mask, you’ll want to incorporate key ingredients that target your skin concerns and deliver real results.
For hydration, look for honey or aloe vera; they’ll nourish and soothe your skin beautifully. If you’re after a brightening effect, consider adding a splash of lemon juice or turmeric. These ingredients can help even your complexion and lift your spirits.
For exfoliation, oatmeal or yogurt works wonders, sloughing away dead skin while delivering probiotics. Lastly, don’t forget oils like coconut or argan; they’ll lock in moisture and add a lovely glow. Incorporating skin-softening oil into your routine can elevate your face mask game to achieve that silky smooth finish.
Each ingredient you choose plays a crucial role, so mix and match based on what your skin craves to enhance that natural beauty of yours.
How to Choose the Right Ingredients for Your Skin Type
To create a DIY face mask that truly works for you, start by identifying your skin type.
Understanding whether your skin is oily, dry, combination, or sensitive helps you choose the right ingredients. Incorporating natural ingredients for acne-prone skin can significantly enhance the effectiveness of your mask.
Let’s explore an essential ingredients guide tailored for each skin type to enhance your mask-making experience.
Identify Your Skin Type
Identifying your skin type is essential for choosing the right ingredients for your DIY face mask.
Start by washing your face and letting it sit for an hour without any products.
Look closely—if your skin feels oily and shiny, you have oily skin. If it feels tight and looks flaky, odds are you’ve got dry skin.
Combination skin will show both characteristics, while normal skin feels comfortable without extremes.
Each skin type craves different care. Once you know where you stand, you can craft a mask that truly nurtures your unique needs.
Embrace this intimate journey of understanding your skin; it’ll lead you to a happier, healthier glow that reflects your true self.
Essential Ingredients Guide
Crafting the perfect DIY face mask hinges on understanding the essential ingredients that complement your skin type. You want to select ingredients that nourish and enhance your natural beauty. Here’s a quick guide to help you choose:
| Skin Type | Key Ingredients | Additional Extras |
|---|---|---|
| Oily | Clay, Tea Tree Oil | Lemon Juice |
| Dry | Honey, Avocado | Coconut Oil |
| Sensitive | Oatmeal, Aloe Vera | Chamomile Tea |
Look for ingredients that will hydrate, exfoliate, or soothe your skin as needed. Trust your instincts and feel free to experiment a little. Your skin will appreciate the loving care you put into creating a mask just for it!
Step-by-Step Guide to Making Your Face Mask
While it may seem daunting at first, making your own face mask can be a simple and rewarding process.
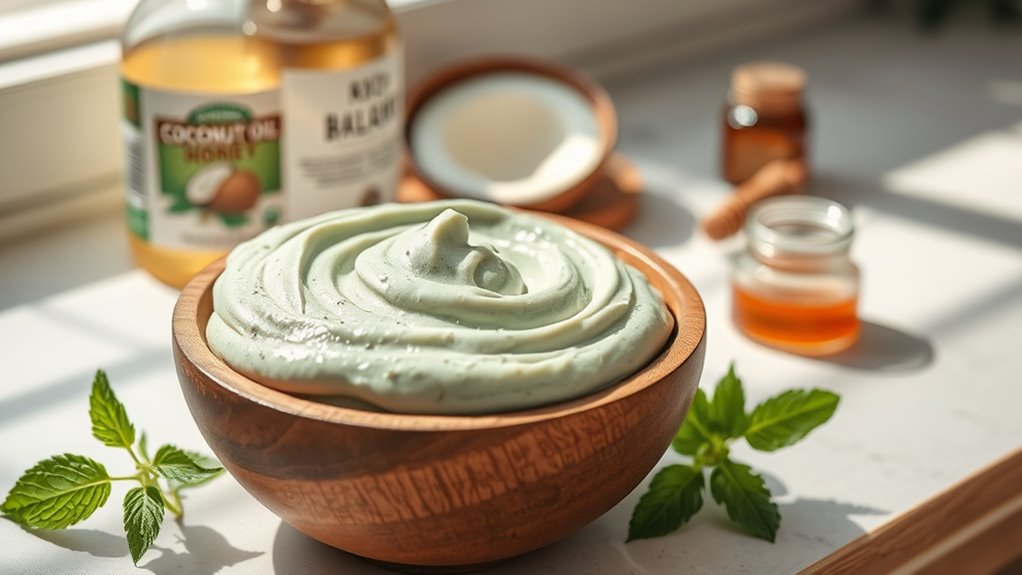
Start by gathering your essential ingredients: a base like yogurt or honey, an exfoliant like sugar or oatmeal, and any nourishing add-ins such as mashed banana.
Once you have your ingredients ready, mix them in a bowl until you achieve a smooth consistency.
Next, cleanse your face gently with warm water to prepare your skin.
Apply the mask evenly, avoiding your eyes and lips. Allow it to sit for about 15–20 minutes as it works its magic.
Finally, rinse thoroughly with warm water, and pat your face dry with a soft towel.
Enjoy the glow, and feel proud of your homemade creation! This DIY face mask can potentially outperform store-bought creams by providing natural nourishment directly to your skin.
Incorporating Essential Oils for Added Benefits
To elevate the benefits of your DIY face mask, consider incorporating essential oils. These aromatic extracts not only enhance your mask’s scent but also offer a wealth of skin-loving properties. For instance, lavender oil soothes irritation and promotes relaxation, while tea tree oil fights blemishes with its antibacterial properties. Just a few drops can transform your mask, creating a spa-like experience right at home.
Mixing in essential oils isn’t just about the fragrance; it’s a way to nurture your skin and spirit. As you apply the mask, take a moment to inhale deeply, letting the calming aromas wash over you. Notably, the use of essential oils can seamlessly integrate into your daily routine, enhancing mood and promoting overall well-being.
This fragrant ritual will make your skincare routine feel intimate and luxurious, leaving you refreshed and radiant. Embrace this natural addition, and pamper yourself!
Targeting Specific Skin Concerns
When it comes to addressing your unique skin concerns, choosing the right ingredients makes all the difference.
For acne control, you might want to try components like tea tree oil or clay, while adding hydration-boosting elements like honey or aloe can transform your skin’s texture.
Tailoring your DIY face mask to these needs can lead to clearer, healthier skin.
Acne Control Ingredients
Battling acne can be a frustrating journey, but incorporating the right ingredients into your DIY face mask can turn the tide.
Think about using tea tree oil, known for its antibacterial properties that can help reduce breakouts. Add honey for its natural antibacterial benefits and soothing qualities that calm irritated skin.
Clay masks, like bentonite or kaolin, act as purifying agents, drawing out impurities and excess oil. You might also consider incorporating witch hazel, which tightens pores and balances skin.
Don’t forget about salicylic acid—it’s a powerful exfoliant that helps unclog pores. Mixing these ingredients in your mask can create a potent synergy, targeting those pesky blemishes and giving your skin a renewed glow.
Your journey toward clearer skin can start today!
Hydration Boosting Components
After addressing acne with targeted ingredients, it’s important to consider hydration for maintaining healthy skin.
Dryness can worsen irritation and breakouts, so adding hydration-boosting components is key. Think about honey’s natural humectant properties that pull moisture into your skin, leaving it plump and dewy.
Aloe vera is another soothing sensation; it hydrates while calming inflammation. Don’t overlook yogurt; its lactic acid gently exfoliates and nourishes, enhancing that glow you crave.
For a luxurious touch, a few drops of nourishing oil, like jojoba or argan, can lock in moisture without clogging pores.
Infuse your DIY mask with these ingredients, and you’ll pamper your skin while ensuring it stays hydrated and happy, embracing a fresh, radiant appearance.
Application Techniques for Maximum Effectiveness
To achieve the best results with your DIY face mask, it’s essential to focus on the application techniques that optimize effectiveness.
Start with a clean, slightly damp face to help the mask absorb better. Gently use your fingertips to apply the mask in upward, circular motions, starting from the center of your face and moving outward. This not only feels refreshing but also promotes circulation.
Take a moment to breathe deeply, letting the mask’s soothing ingredients envelop you. If you can, relax for at least 15 minutes before rinsing with lukewarm water.
Pat your face dry with a soft towel, and follow up with your favorite moisturizer. You’ll feel that intimate connection to your skin, nurturing it with love and care.
Frequency of Use for Best Results
Regularly using your DIY face mask can significantly enhance your skin’s health and appearance. Aim to apply it 2-3 times a week for the best results.
This frequency allows the nourishing ingredients to penetrate deeply, giving your skin the love it craves without overwhelming it. Listen to your skin; if it feels a bit sensitive, you can ease back to once a week and gradually build up.
Consistency is key; making this part of your self-care routine ensures you’re treating yourself right. And remember, nurturing your skin is like nurturing a relationship—patience and care go a long way.
After a few weeks, you’ll notice a beautiful difference, and your skin will thank you!
Storing Your DIY Face Mask
When it comes to storing your DIY face mask, choosing the right container is crucial for maintaining its freshness.
A good airtight option can keep your mask effective for longer, so make sure to consider your storage choices.
Plus, knowing the shelf life helps you use your mask at its best.
Best Storage Containers
Selecting the right storage container is crucial for keeping your DIY face masks fresh and ready for use. You’ll want containers that are airtight and made of glass or BPA-free plastic, as these materials help preserve the ingredients’ potency.
Small mason jars or reusable silicone pouches work beautifully for this purpose. These containers allow you to see how much you’ve got left while keeping moisture and air out.
Don’t forget to label each container with the mask’s name and date you made it—it adds a personal touch and helps you keep track. Plus, storing your masks in the fridge can enhance their cooling and soothing effects.
Shelf Life Tips
To ensure your DIY face masks remain effective, pay close attention to their shelf life. Storing them properly can make all the difference. Here are some handy tips:
| Storage Method | Shelf Life |
|---|---|
| Refrigerated | Up to 1 week |
| Freezer | Up to 1 month |
| Airtight Jar | 3-5 days (room temp) |
| Glass Container | 1 week (in fridge) |
Always keep your masks in airtight containers, and avoid exposing them to light or heat. If you notice any odd smells or changes in texture, toss them out. By taking these small steps, you’re giving your skin the best care it deserves, and you won’t have to waste your precious creations!
Common Mistakes to Avoid
While creating your DIY face mask can be a fun and rewarding experience, there are common mistakes that can undermine your efforts. One big pitfall is using expired or low-quality ingredients; fresh, natural items deliver the best results.
Another mistake is ignoring your skin type; what works for someone else mightn’t suit your skin’s unique needs. Don’t skip patch testing, either; it’s crucial to ensure you won’t have an adverse reaction.
Also, be mindful of the mask’s application time; leaving it on too long can irritate your skin. Lastly, don’t forget to store any leftover mixture properly—air exposure can reduce effectiveness.
Personalizing Your Face Mask Recipe
When you tailor your face mask recipe, your skin’s unique needs take center stage. Think about what your skin craves—hydration, exfoliation, or maybe a little brightening.
You might blend honey for its soothing properties, yogurt for gentle exfoliation, or avocado for deep nourishment. If you battle acne, reach for tea tree oil or lemon; for dry skin, consider adding a few drops of essential oils.
Play around with textures, too! Whether you enjoy creamy or gel-like masks, the choice is yours. Remember to patch-test new ingredients to ensure they’re kind to your skin.
Transitioning From Store-Bought to Homemade Skincare
Making your own face mask opens the door to a broader world of skincare possibilities, especially if you’re looking to replace store-bought options.
As you dive into homemade skincare, you’ll discover the joy of crafting products tailored just for you. Start with simple ingredients you likely already have, like honey or oatmeal, and experiment. Feel the difference as you blend natural components, knowing each one nourishes your skin without harsh chemicals.
Transitioning can seem daunting, but take it one step at a time. Begin by swapping out one store-bought product, then allow your skin to adjust.
You’ll soon find that these loving, personalized creations work wonders, reconnecting you with what truly matters in your self-care routine—authenticity and nourishment.